Contact CustomerService@unilock.com or please fill out the form below with details about the issue.
How to Build a Retaining Wall
Retaining walls are a critical part of many landscaping projects and must be constructed properly. When planning, you must take into account:
- The height of the wall
- The slope of the area above the wall
- Any loads that are on top of the wall
- Water drainage patterns
- Overall stability of the surrounding area
Ensure that the product you choose is suited to the wall you plan to build. If you are unsure about product selection, required setback or any other design detail, consult an engineer or reach out to your local Unilock Territory Manager.
- Tools and Equipment
- Construction Supplies
- Before Starting
- Excavation
- Preparing the Base
- Installing the Filter Fabric
- Managing Drainage
- Base Installation
- Leveling the Base
- Installing the First Row
- Adding Rows
- Backfilling the Drainage Layer
- Installing Geogrid
- Installing Coping
- Wrapping the Drainage Layer
- Finishing
- Congratulations - your retaining wall is complete!
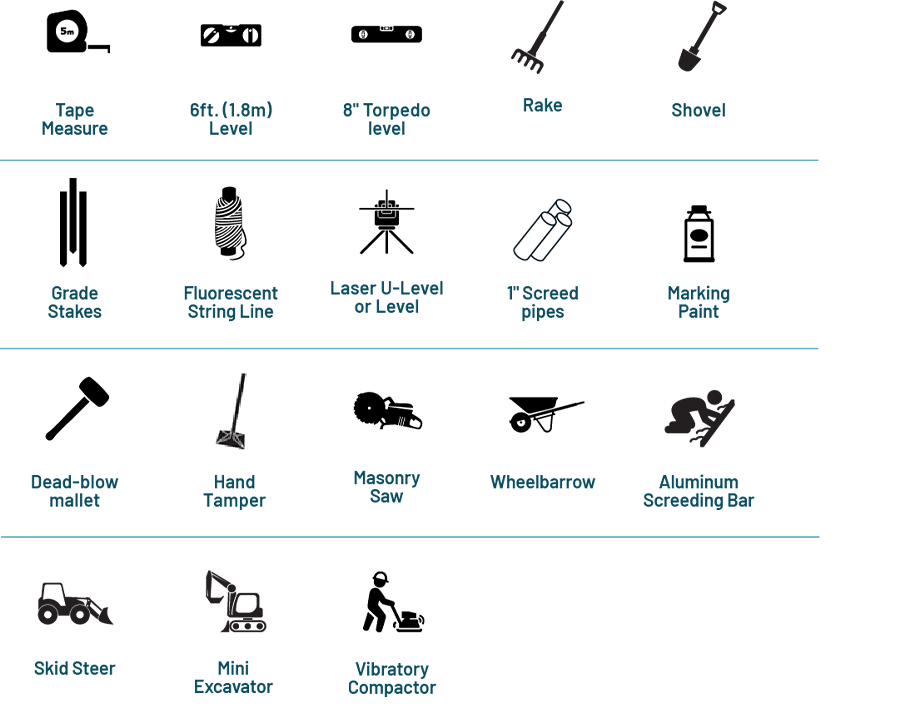
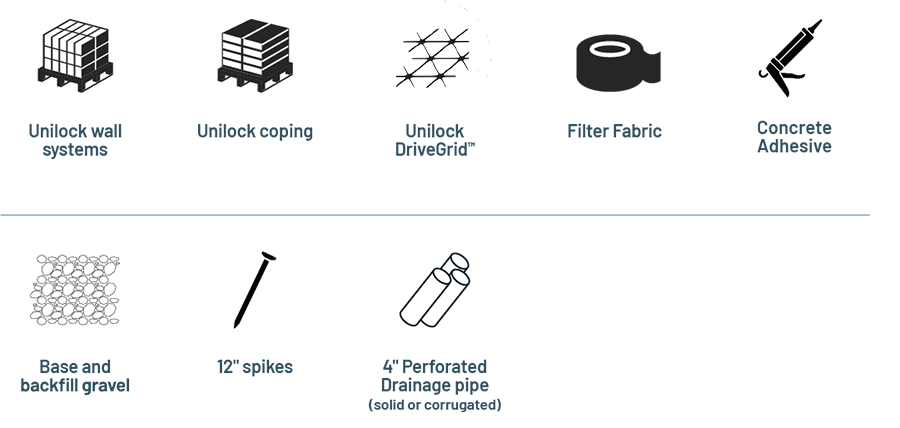
A well thought-out design combined with proper planning will ensure the project proceeds smoothly and helps ensure a quality installation.
Pre-ordering materials early will help your project go smoothly.
IMPORTANT: For the personal safety of everyone on site, be sure to have all underground utilities located and clearly marked prior to excavation.
Checklist
- Secure a Building Permit if required by local area
- Order accessories (DriveGrid, drainage pipe, etc.)
- Arrange a utilities “locate” before excavation
- Order Unilock wall products
- Check with local municipality for any required permits
- Order bulk materials (base material, bedding material)
- Inspect site to identify possible challenges or obstacles
- Establish jobsite layout and progression
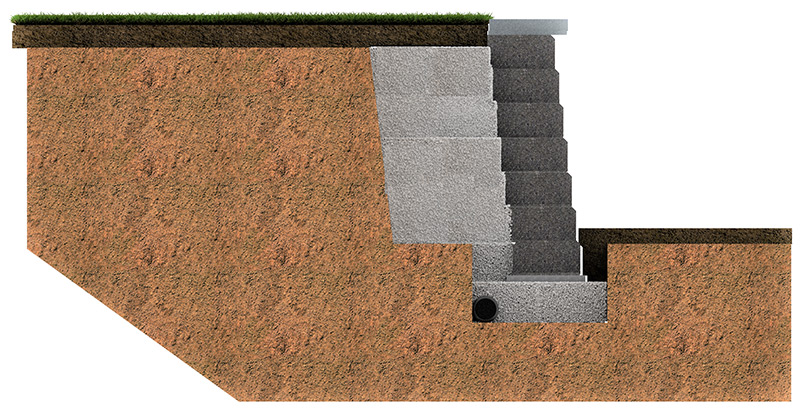
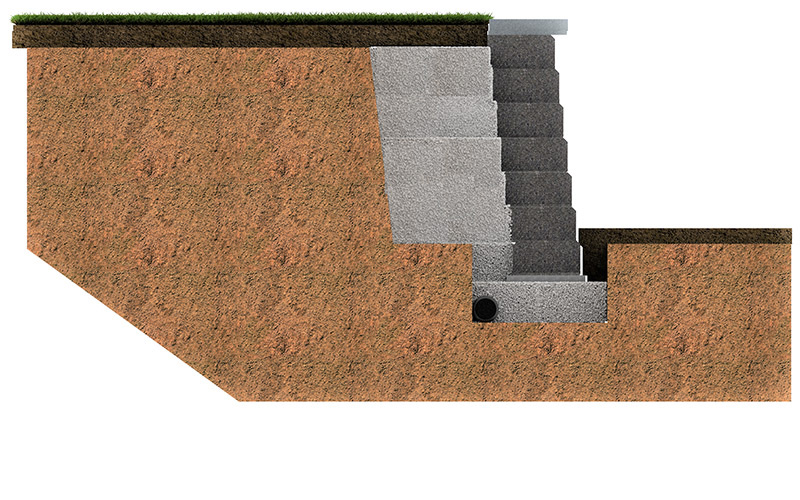
Step 1: Excavate native soil to a minimum of 14″ away from the vertical face of the wall. This area will be later filled with gravel which is called the “drainage layer”. Without this layer the wall will fail. Always follow product-specific instructions and consult with a professional engineer for walls over 36″. If your project requires geogrid reinforcement, excavate enough earth to accommodate the geogrid and additional gravel that is required. Most retaining walls slope back to provide additional strength. This is called a ‘batter’. Take this into consideration when excavating and remove native soil following the same angle.
Step 2: Further excavate a trench in the location where you plan to build your wall. The trench should be eight inches deeper than the height of one wall block, and twice as wide.
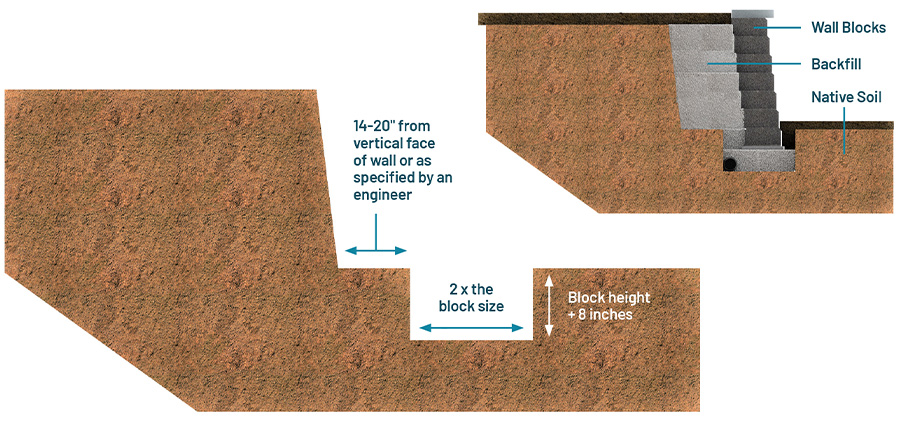
Understanding the volume of earth that needs to be removed is important. Volume can be deceiving! Ensure you have proper access, equipment and disposal arranged.
Retaining Walls are extremely heavy, so it is important to provide as much stability as possible to prevent settlement.
Step 1: Always build on stable subsoil. More excavation may be required if the native soils are soft or there is deep topsoil. Keep excavating the trench until you reach a stable subsoil.
Step 2: Run a vibratory compactor over the excavated surface to consolidate any loose soil particles.
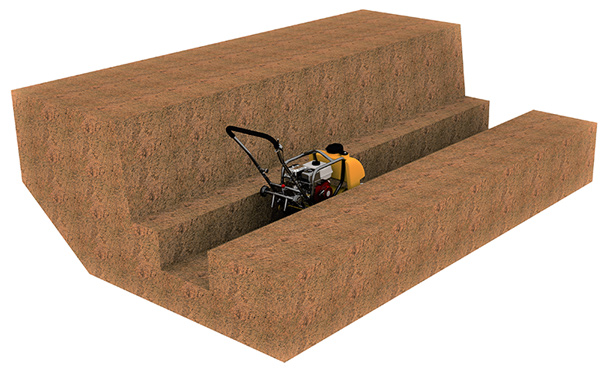
Step 3: Install a layer of DriveGrid directly over the subsoil. This will help prevent differential settlement.
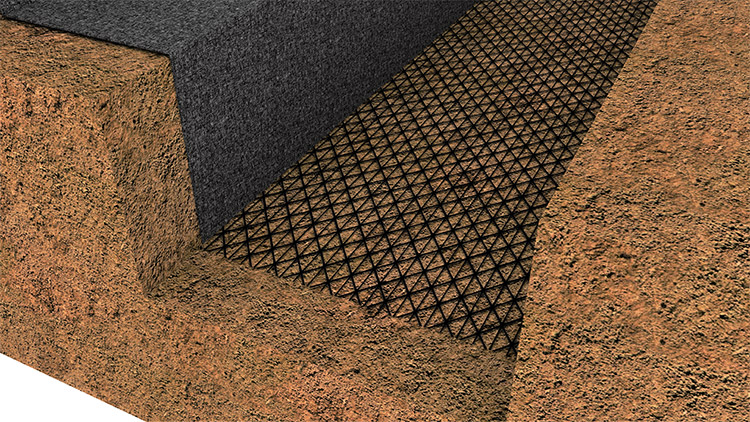
Step 1: Line the excavated surface with filter fabric. This will prevent soil from migrating into the backfill material.
Step 2: Leave enough on the topside to fold over the backfill layer and reach the wall’s coping once the wall is installed. You can pin it back with temporary spikes for now.
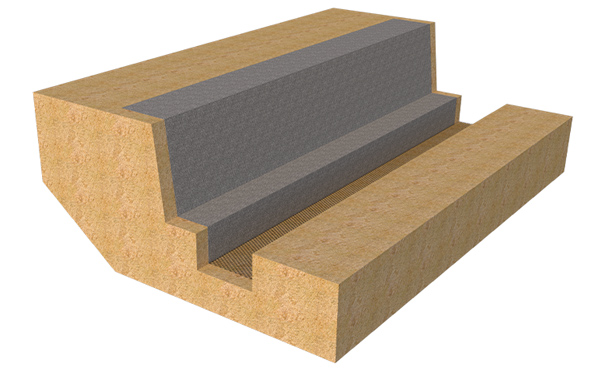
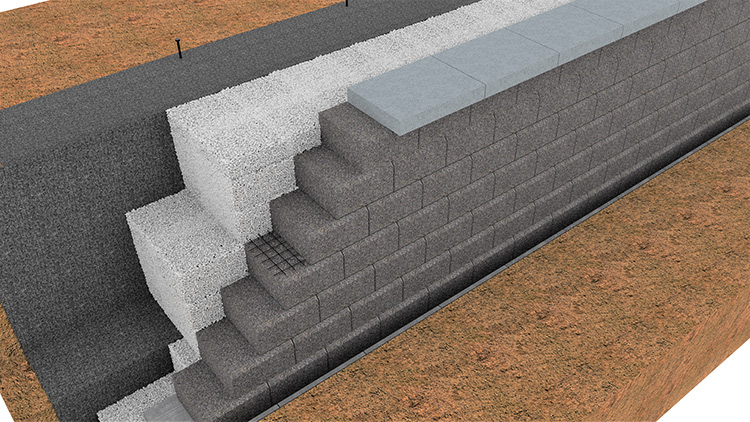
Water that collects in the backfill can cause settlement so it’s a good idea to manage this with weeping tile. Drains can also be placed through the face of the wall (see retaining wall cross sections at Unilock.com for additional information).
Step 1: Place a 4″ plastic weeping tile pipe at the bottom of the trench.
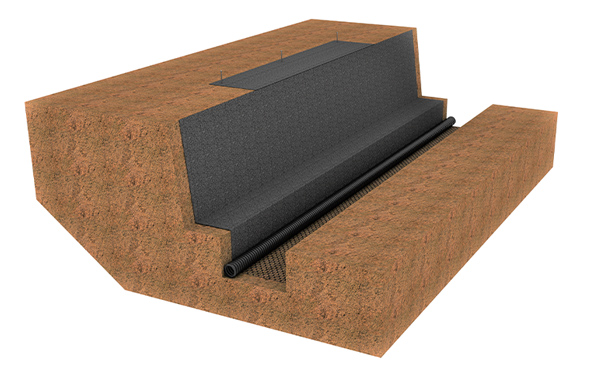
Step 2: Exit the pipe to a drain or lower grade at the end of the wall. This is called “daylighting” or “exiting”.
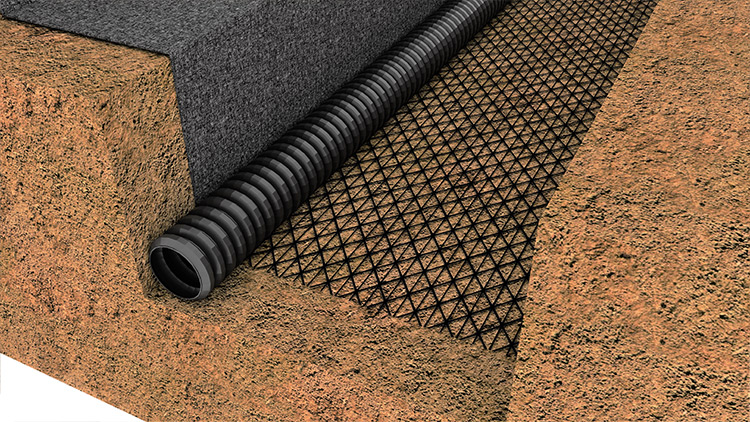
Step 1: Fill the trench with 6″ (15cm) of 3/4″ open-graded gravel (ASTM No. 57).
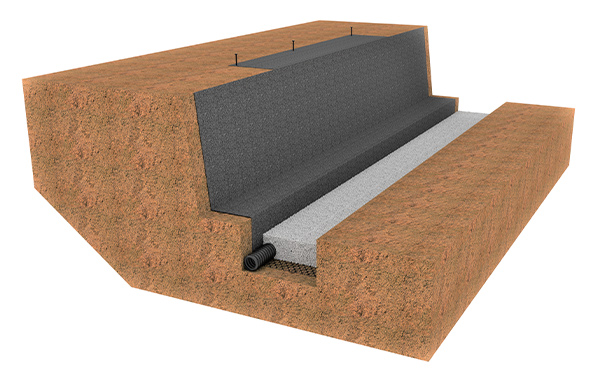
Step 2: Compact the surface using a vibratory compactor to consolidate the gravel particles.
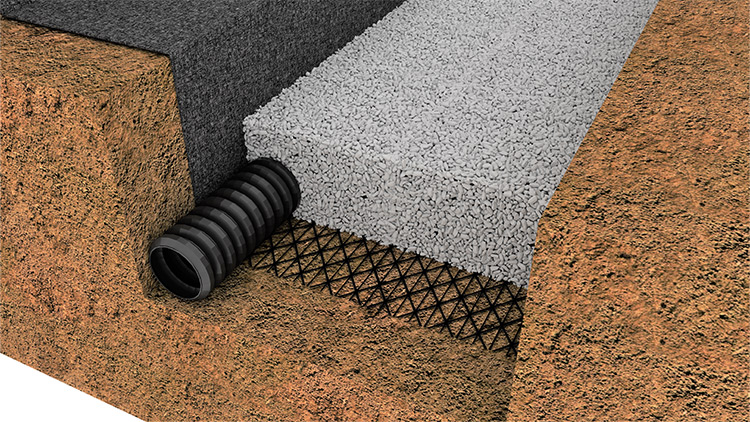
Step 1: Place 1″ pipes over the gravel base and screed a layer of 1/8″ open-graded chip stone (HPB or ASTM No. 9) to create an accurate surface. Remove the pipes and fill the grooves that are left behind.
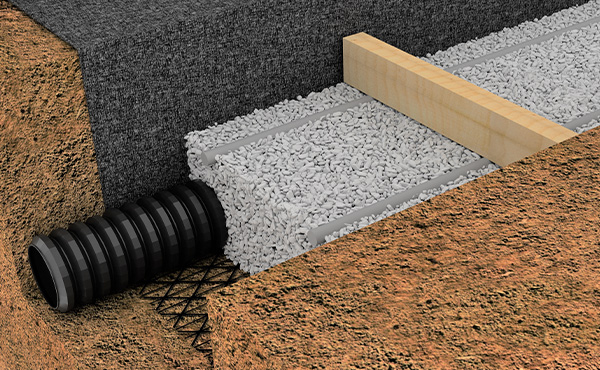
Step 2: Install U-Grip™ Base Pads overtop the prepared surface or pour a concrete base pad. Installing a level concrete surface of some type will help speed your installation by improving leveling accuracy and will help minimize differential settlement. For large projects and heavy wall units, a poured concrete base pad is recommended.
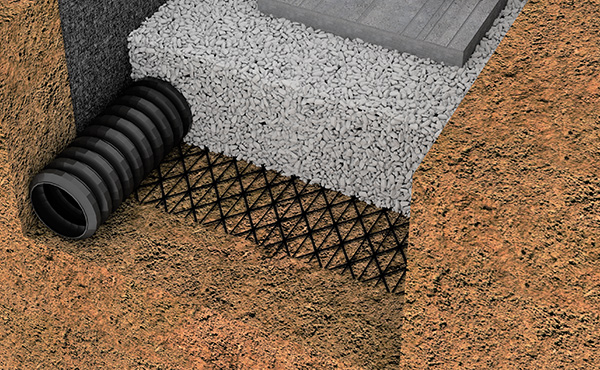
Step 3: Use a U-Level™ or laser level to ensure the installation is level from end to end.
Step 4: Make small adjustments side to side and front to back using a 24″ (60cm) level and mallet.
Step 1: Install the first row of blocks directly over the U-Grip Base Pads or poured-in-place concrete. The lines embossed into the surface of the U-Grip Base Pads can assist you in maintaining alignment. However, a stringline is the best way to ensure the wall is perfectly straight.
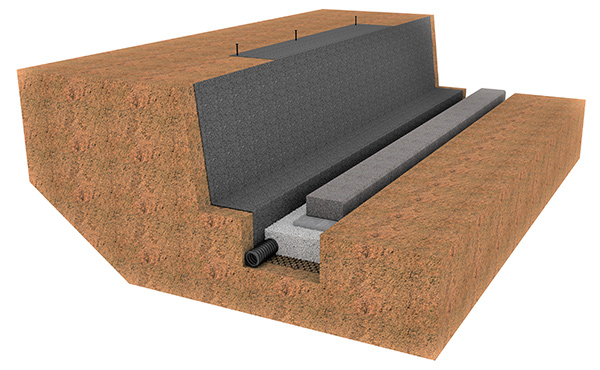
Step 2: Stabilize the first row of blocks by filling the trench with gravel on the front and back of the wall blocks. This will wedge the first row into place in the trench.

Step 1: If the wall system you are using is designed with a tongue and groove system that locks units to the one above, you can place the next row of units directly on top of the first row. Be sure to use the groove that provides the correct setback for your wall design, and offset vertical joints by one-half block. If the wall system does not have a locking feature, concrete adhesive must be used between each layer.
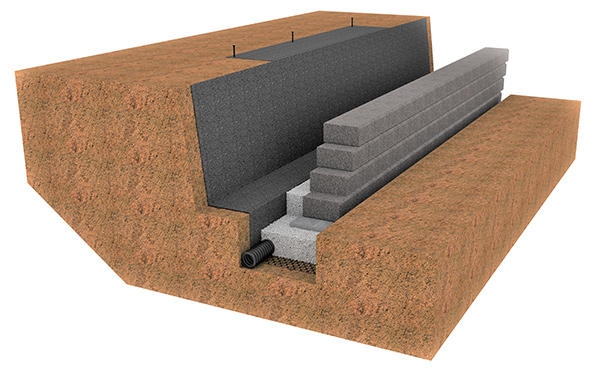
NOTE: You may need to cut a half block to start the row in order to offset the vertical joints.
Step 2: Backfill with gravel as you go. Never stack more than 18″ (45cm) of wall before backfilling.
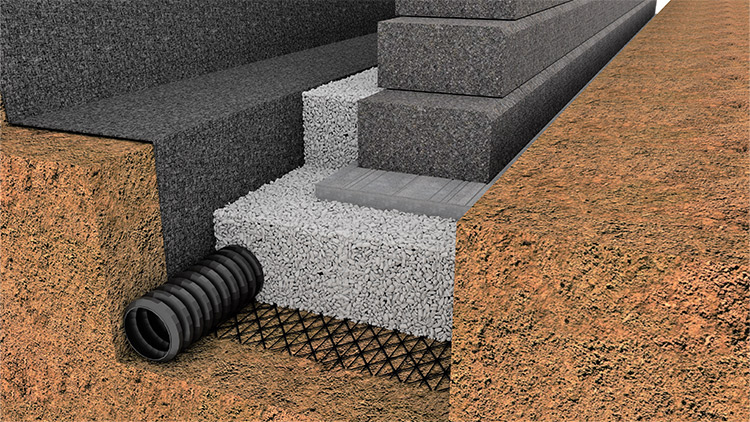
The drainage layer of gravel behind the wall is a critical component of the installation. Without this layer the wall will fail. Use the same gravel as the base and ensure that it fills a minimum of 14″ (35cm) behind the face of the wall (NOTE: some wall designs may require more). Always follow product-specific guidelines and the directions of a professional engineer for walls over 36″ (90cm) in height.
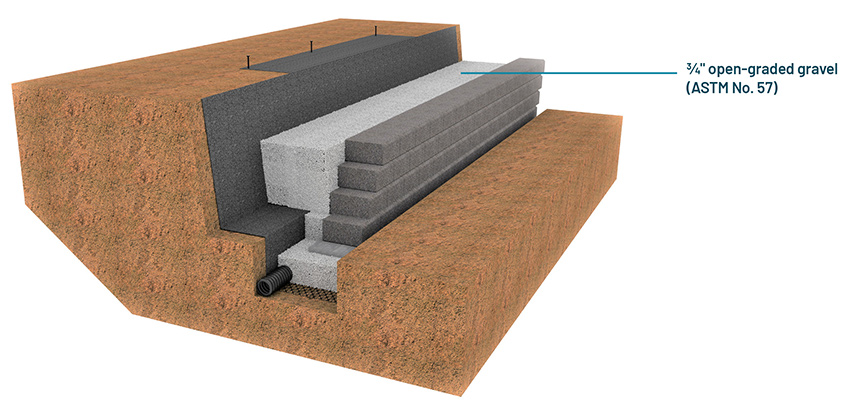
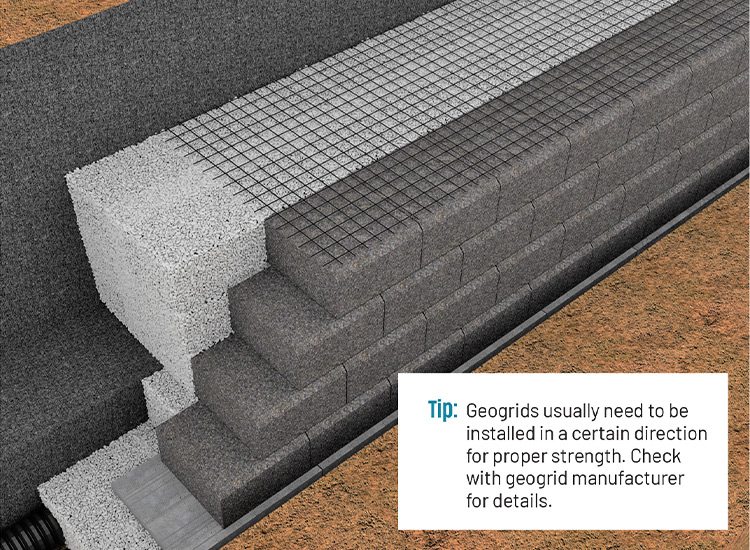
Geogrid is not required for all walls. It depends on the height of the wall, the loading and the type of wall product chosen. Geogrid helps you build higher and stronger walls.
- Step 1: Consult an engineer to determine the length of geogrid and the number of layers required. For preliminary drawings you can find cross sections at Unilock.com.
- Step 2: Place the required sections of geogrid on top of the row of blocks, 1″ (2.5cm) back from the face of the wall, and extend it back on top of the drainage layer as required by engineer.
- Step 3: Place the next row of blocks overtop the geogrid. The weight of these blocks will hold the geogrid in place.
- Step 4: Tighten the grid over the backfill and pin it tight to the gravel near the embankment using several 12″ spikes. This will temporarily hold it under tension until you are ready to add more backfill on top of the grid.
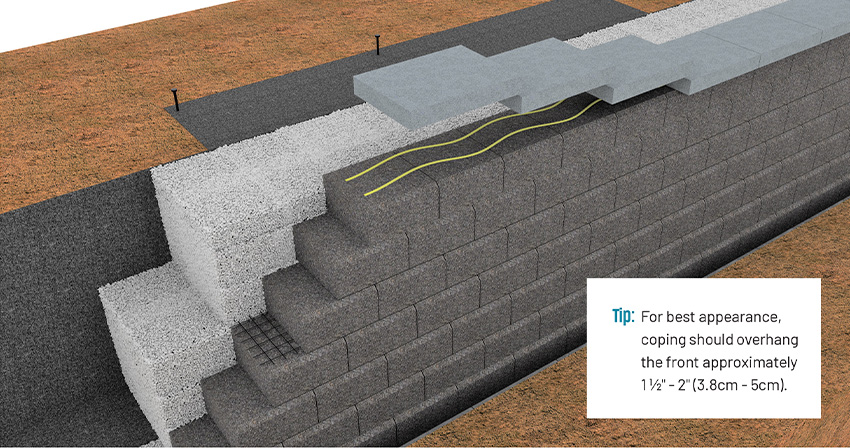
Most Unilock retaining wall systems are designed to be capped using one of several coping types.
Step 1: Make sure the surfaces on the top of the wall and the underside of the coping are clean and dry.
Step 2: Coping looks best when it overhangs the face of the wall by 1 ½” to 2″ (3.8cm – 5cm). Secure the coping with two ¼” (.5cm) beads of concrete adhesive.
Wrapping the filter fabric over the top of the backfill is critical to the longevity of a retaining wall. Filter fabric prevents the clear stone backfill from becoming clogged with soil fines over time. If the backfill clogs, the integrity of the wall will be compromised.
Step 1: Once the drainage layer has been backfilled to a point 6″ (15cm) below the top of the coping, lift the section of filter fabric you had temporarily pinned down on the embankment, and fold it over the drainage layer.
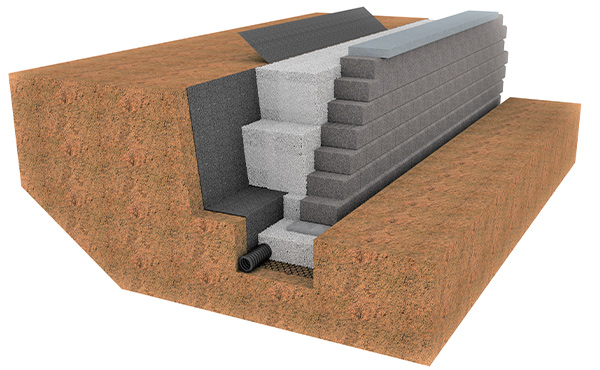
Step 2: Trim the filter fabric if needed so that it tucks comfortably behind the wall blocks.
Step 3: Spread topsoil over the filter fabric to just below the coping.
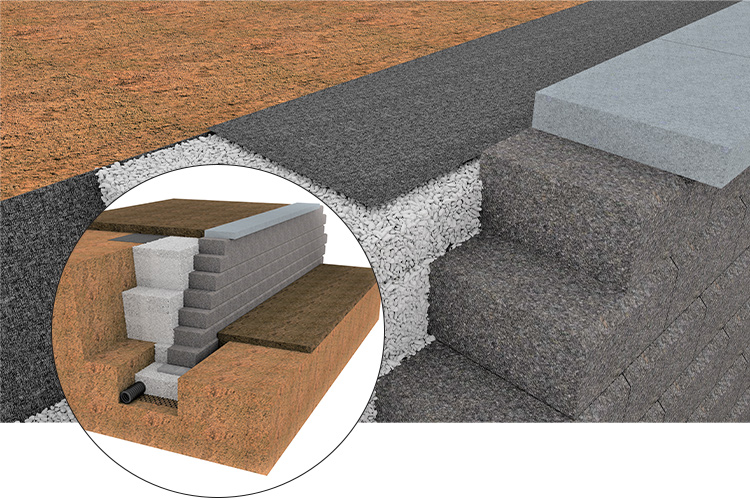
The layer of filter fabric should be approximately 6″ (15cm) below the top of the coping.
Once your topsoil has been placed over the filter fabric it is recommended that the area be sodded or mulched immediately to prevent erosion.
Step 1: Slope the area on the lower side of the wall approximately 2-5% so that water is carried away from the base of the wall.
Step 2: Similarly, on the top side of the wall, slope the topsoil 2-5% away from the wall to prevent water from collecting behind the wall.

NOTE: A carefully graded swale, created before you place the final layer of sod will direct the water flow away from the wall.
For more help designing and building retaining wall projects, contact your local Unilock Territory Manager (1-800-UNILOCK) to arrange a phone consultation or site visit.
