How to Build an Outdoor Kitchen
There are THREE ways to build an outdoor kitchen.
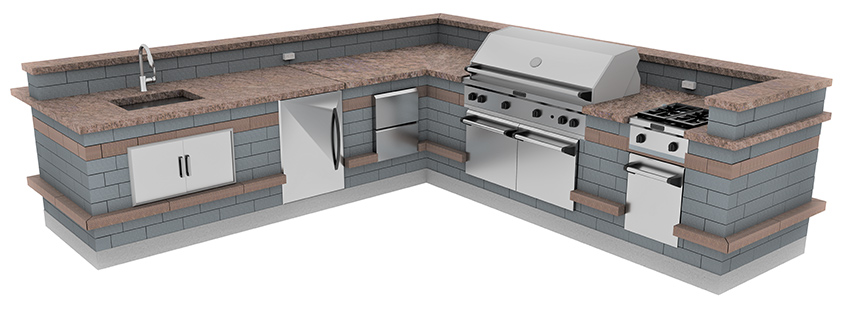
- TRADITIONAL GRILL ISLAND CONSTRUCTION
Build using Unilock wall blocks. - U-CARA MODULAR SYSTEM
Build with Fascia panel on Unilock modular aluminum frame system. - U-CARA WALL MOUNT SYSTEM
Build your own custom cabinet and mount U-Cara® panels to the face using the U-Cara Wall Mount System.
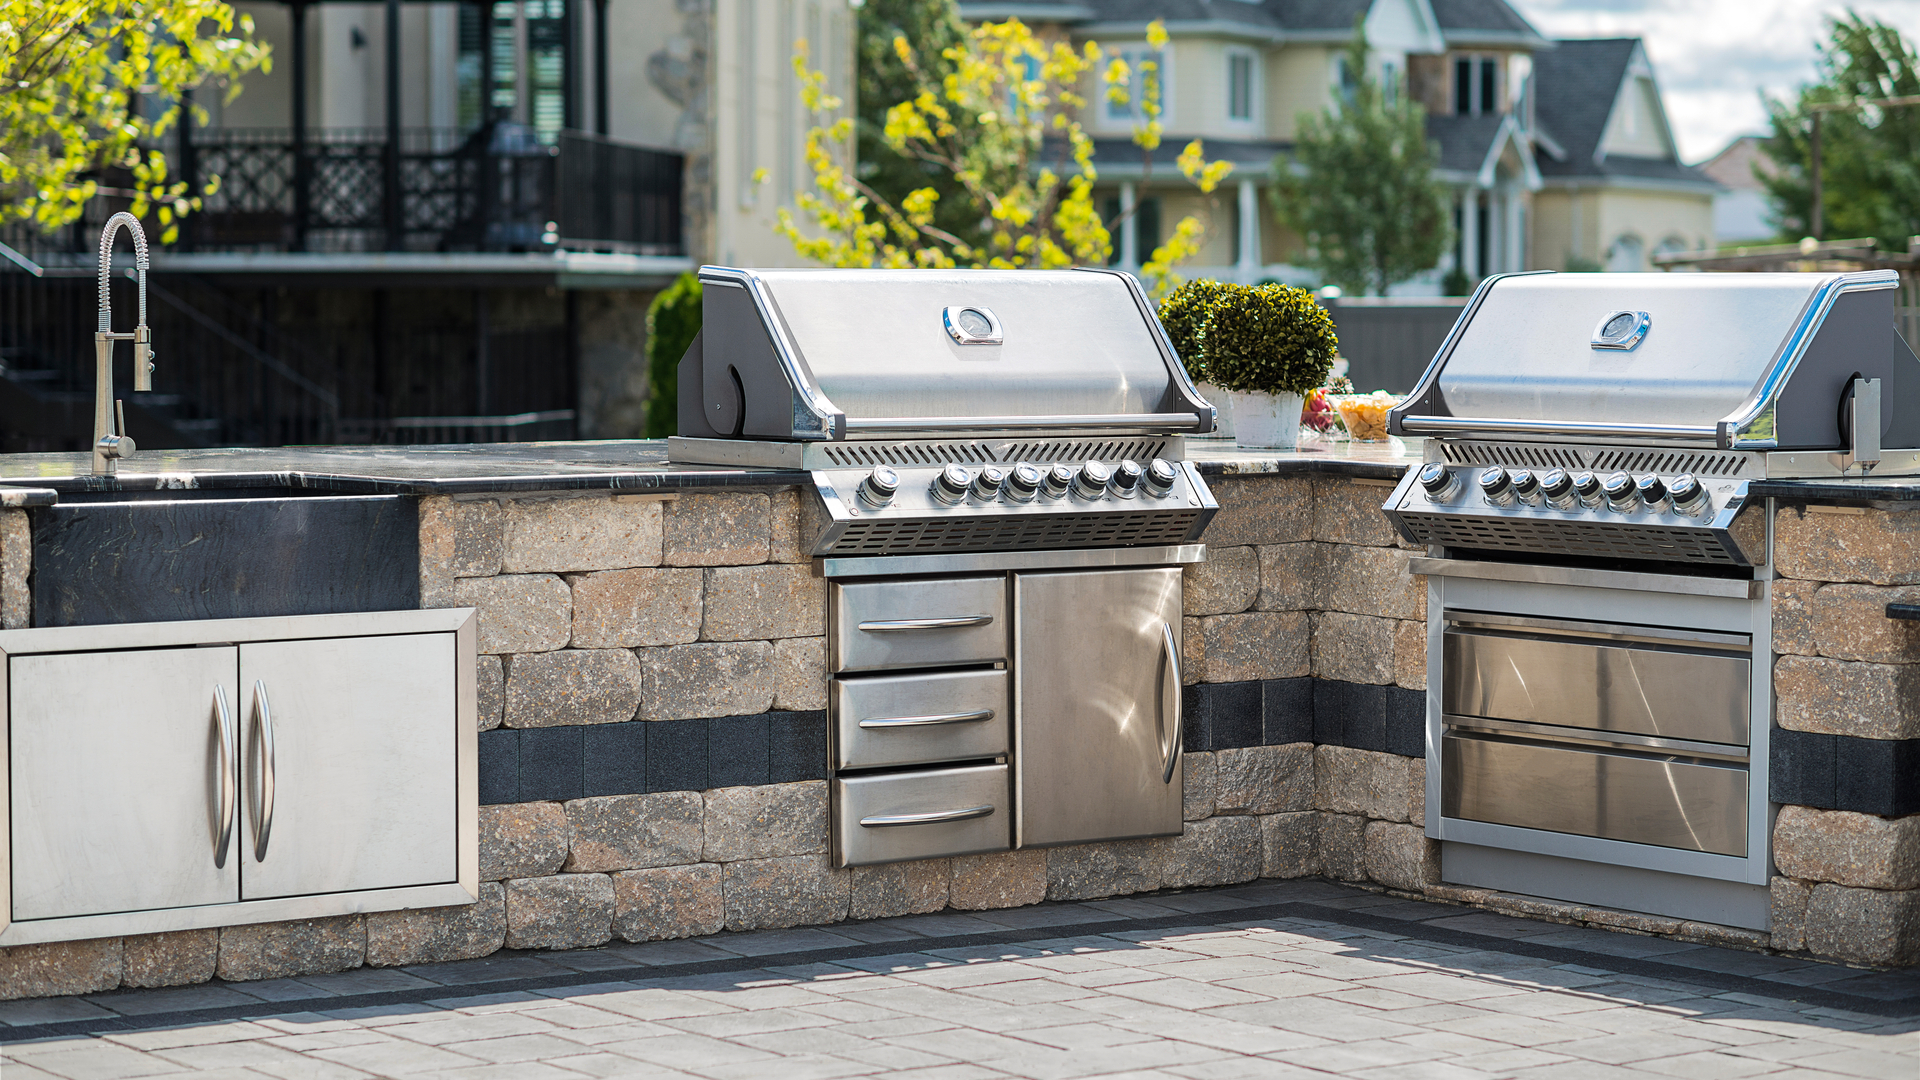
This guide will take you through the TRADITIONAL GRILL ISLAND CONSTRUCTION method which will allow you to construct a grill island with several wall systems from Unilock. The instructions in this guide are based upon Unilock Brussels Dimensional Stone, but can be applied to several of Unilock wall systems such as Lineo, Concord Wall, and Estate Wall. The key is to use a wall system that is no more than 9 or 10 inches deep (front to back) so that there is minimal loss of internal space.
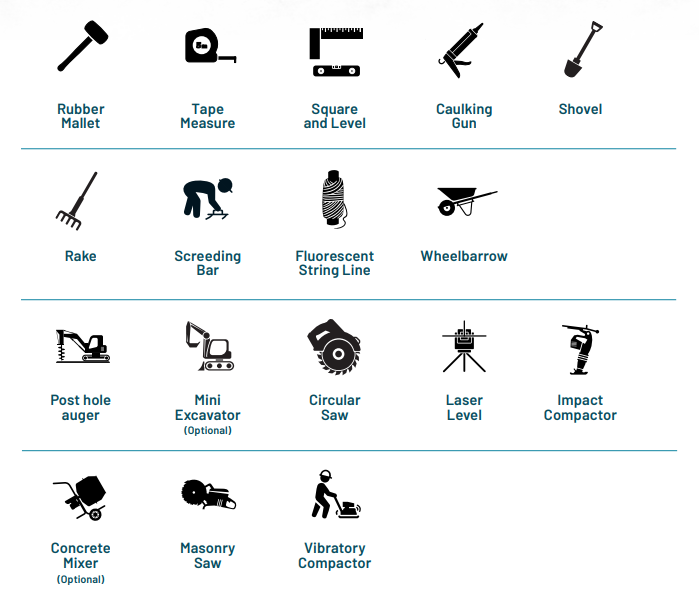
- Tools and Equipment
- Construction Supplies
- Before Starting
- Planning the Size
- Planning Utilities
- Forming and Pouring the Base Pad
- Installing the First Row
- Installing the Second Row and Corners
- Installing a Foot Rest/Accent
- Appliance Templates
- Fourth Row
- Installing Subsequent Rows (5-7)
- Using Lintels to Support Appliances
- Installing the Final Rows (8-9)
- Installing the Countertop
- Bar Counter Extension
- Adding a Backsplash
- Installing Backsplash Coping
- Installing the Appliances
- Congratulations - your outdoor kitchen is complete!

Pre-ordering components and arranging required technicians early will help your project go smoothly
CHECKLIST
- Choose and order Unilock Wall Product
- Pre-arrange licensed gas fitter, electrician and plumber
- Draw a basic design indicating position of all components
- Decide on a counter-top product and incorporate into estimated timeline
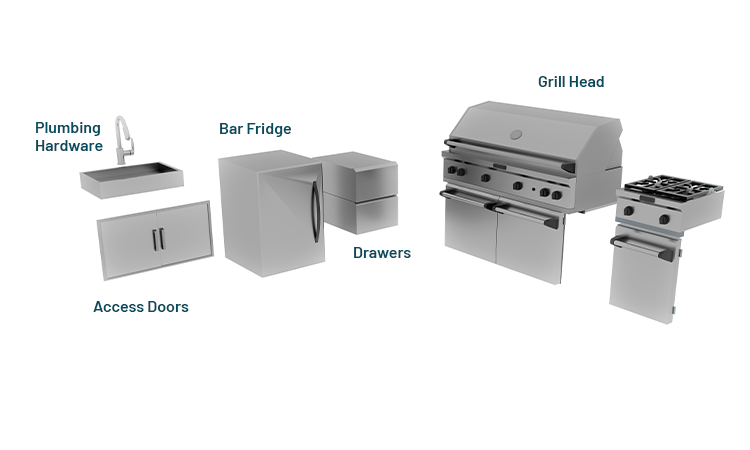
- Order your grill head and components
- Arrange a utilities “locate” before excavation
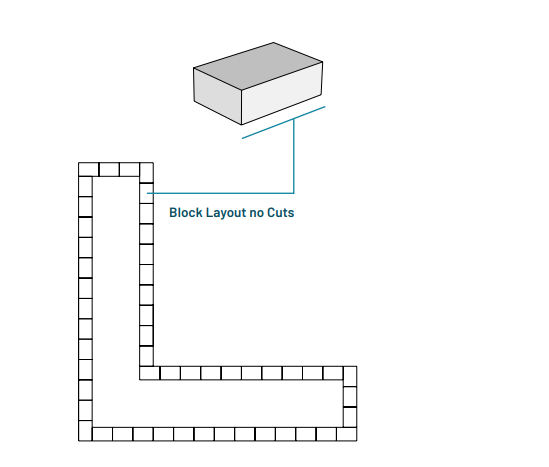
Once you’ve selected a Unilock product, reduce cutting by using the unit dimensions to determine the optimal size for your island. Proper size planning can reduce cutting by up to 90%.
Plot your design on a computer or graph paper to fine tune the dimensions prior to building the foundation.
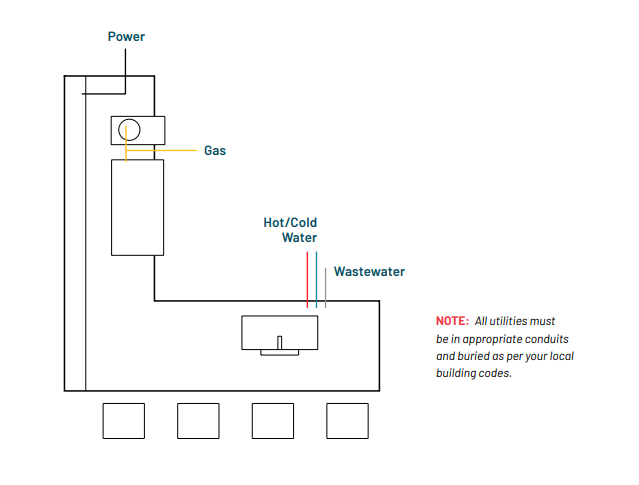
Once you’ve selected a Unilock product, you can begin to plan out the size and layout of the island. Consider where utilities will run to and from before you begin excavation.
- Step 1: Excavate and fill area with compacted freedraining gravel (min 6” below bottom of pad).
- Step 2: Install utility conduits to approximate location in island.
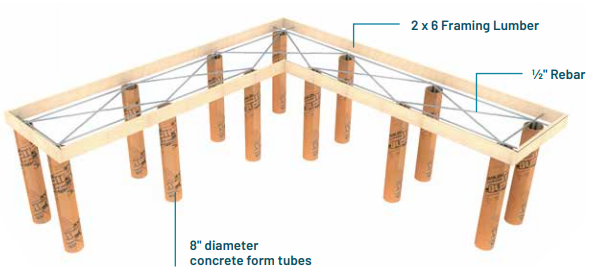
- Step 3: Build a form with 2 x 6 lumber using the wall unit sizes to determine the optimal size. Be sure to position the form precisely, perpendicular or parallel to the house, or in accordance with your overall project plan. The form must be perfectly level.
- Step 4: Construct pad on concrete supports (Sonotubes®).
- Step 5: Construct the base pad on concrete supports (Sonotubes) and create reinforcements with rebar and/or mesh.
Concrete must be cured for at least 72 hours before starting construction.
- Step 1: Unpackage all grill island components to ensure the correct item and size was delivered.
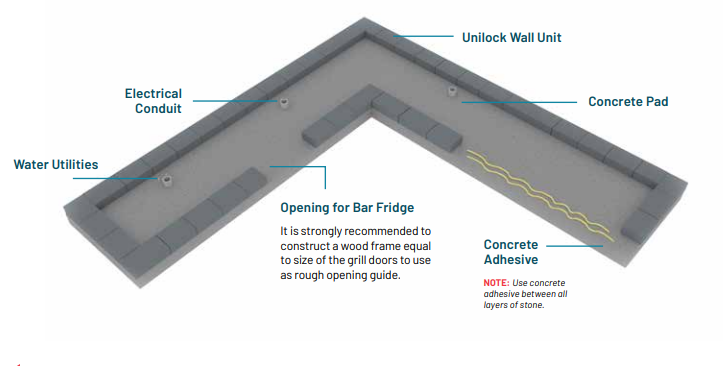
- Step 2: Apply two ¼” beads of concrete adhesive between blocks and base pad.
- Step 3: While placing your first row of units around perimeter, leave any appliance openings as per your plan.
- Step 4: Use a string line or aluminum screeding bar to maintain alignment and square.
- Step 1: Installing the second row is much the same as the first row except that you will “lap” or “log cabin” the inside and outside corners as shown below.
- Step 2: Always use adhesive between every row of units. Using your carpenter’s square, level, tape measure and screeding bar, carefully ensure that all units are in both vertical and horizontal alignment with the first row before the adhesive sets.
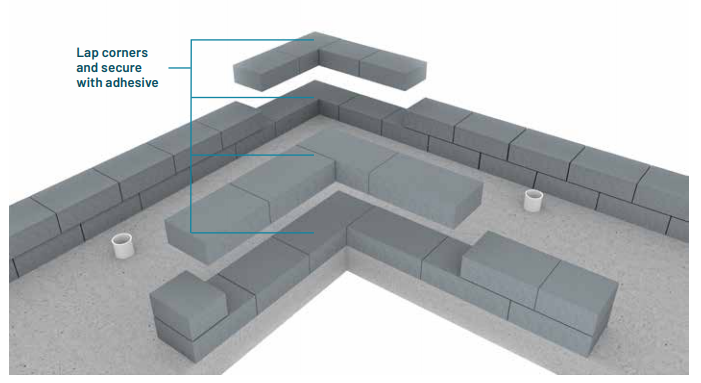
NOTE: Use concrete adhesive between all layers of stone
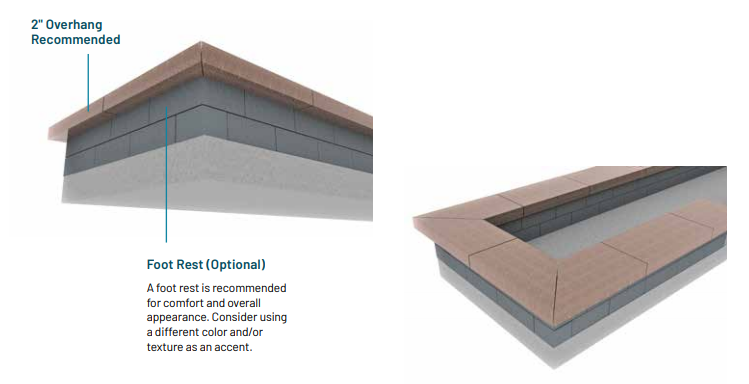
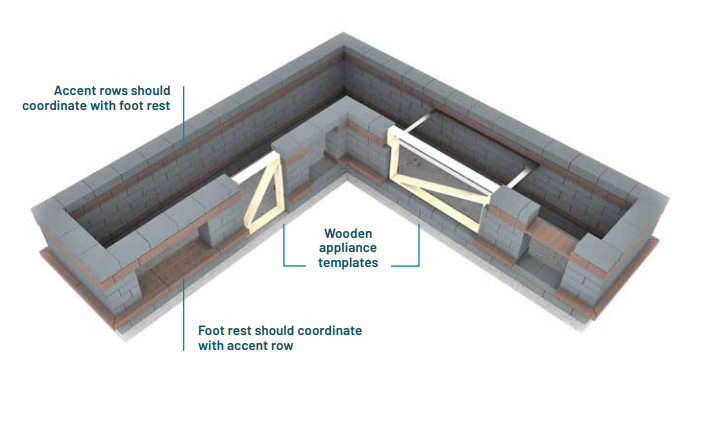
- Step 1: Determine which course is appropriate for the foot rest in order to optimize comfort and visual appeal. Typically this is the third or fourth course, depending on product unit heights.
- Step 2: In this illustration, the foot rest is made from a thinner material such as coping. Coping should overhang approximately 2″ beyond the face of the island.
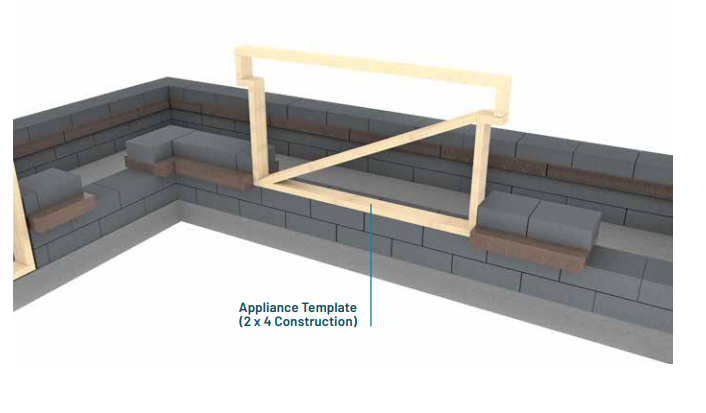
Create appliance templates using 2 x 4 lumber to use as a fitting guide while constructing the island to protect appliances from damage during construction.
- Step 1: Ensure the adhesive on previous rows is completely set/cured. You may need to pause between rows to ensure this is the case. Do not begin this row before the previous rows are set.
- Step 2: Resume the bond offset that was established in the first two rows when placing this row, for a pleasing appearance.
- Step 3: Double and triple check units to ensure they have not gone out of alignment before the adhesive sets. Keep corners and small pieces in place using duct tape if required.
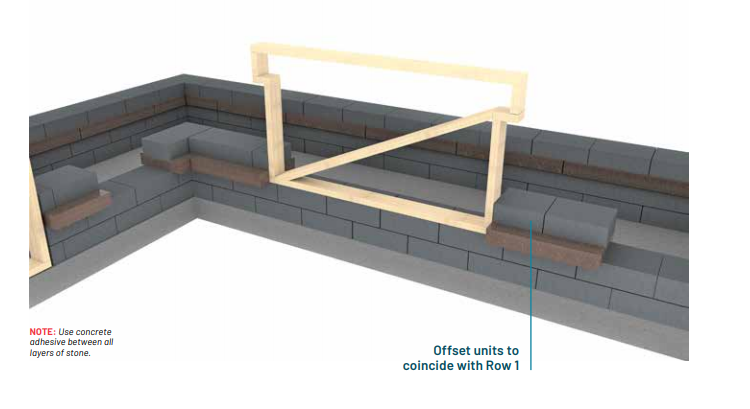
- Step 1: Once the glue has set, you can continue with rows 5, 6, and 7 making sure that the glue sets between rows.
- Step 2: Be sure to double and triple check as you build that the horizontal and vertical alignment has not shifted.
- Step 3: Use the appliance template to help you stay on track with size and position. Remove the template as needed when installing the lintels.
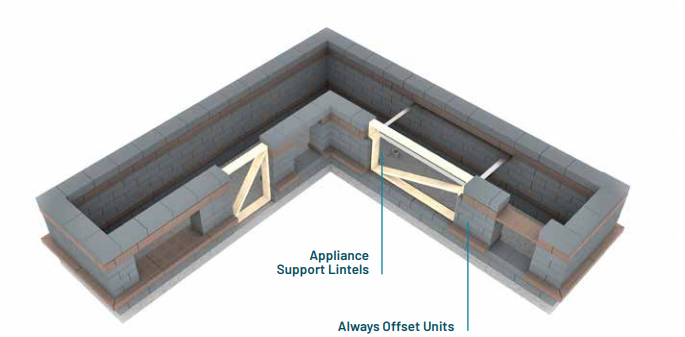
NOTE: Use concrete
adhesive between all
layers of stone.
- Step 1: Always follow the appliance manufacturer’s recommendations for bracing and supporting the appliances.
- Step 2: Bracing should be done with Aluminum lintels. Steel can be used, but over time it can rust and sometimes bleed through the face.
- Step 3: To ensure the lintels sit flush, notching of the wall units may be required. A small grinder is best for this. Glue the lintels in place with concrete adhesive.
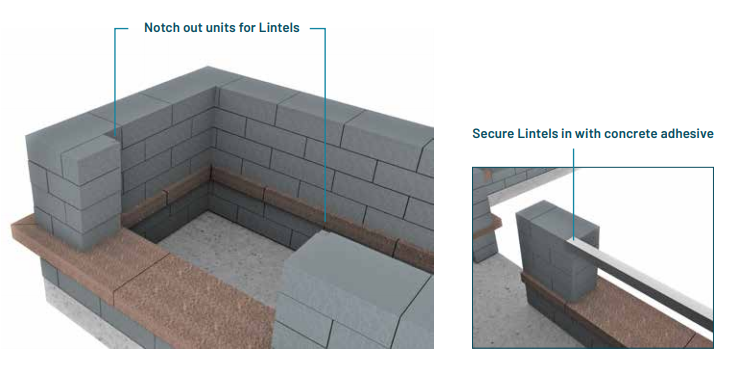
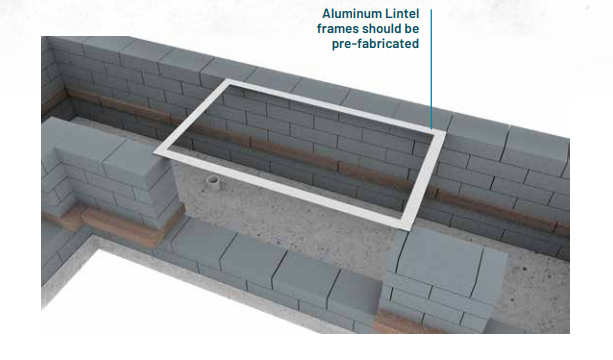
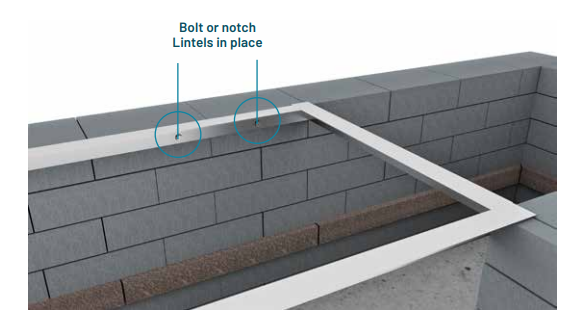
The final rows present an opportunity to introduce a contrasting color or texture by inserting a row of accent pavers or using a different color of the wall product you have chosen.
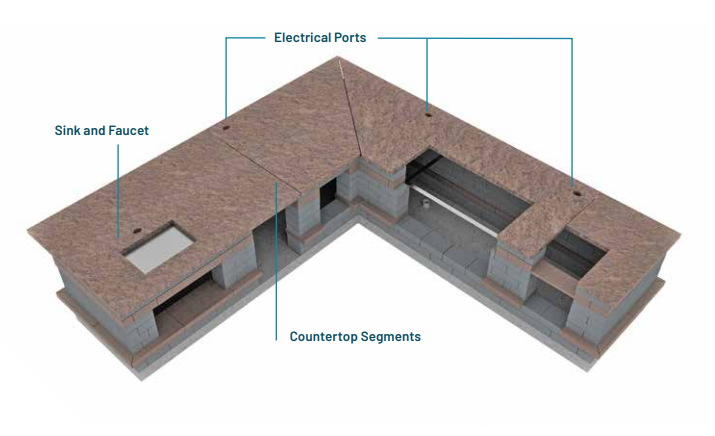
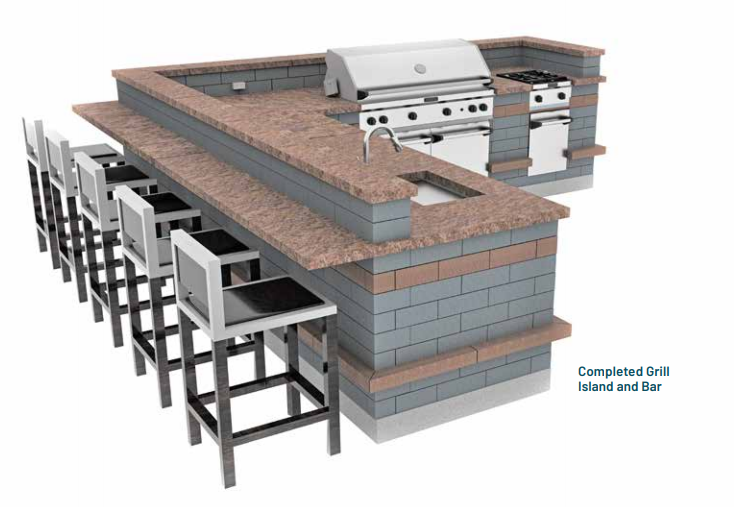
When planning a countertop, ensure that it extends 2″ beyond the face of the island. To accommodate seating on the bar side of a counter, increase this to 12″ from the face of the island. Your countertop manufacturer will provide guidance regarding segmentation and electrical ports can be drilled after the counter is in place. Poured concrete can be constructed on site but should contain expansion joints.
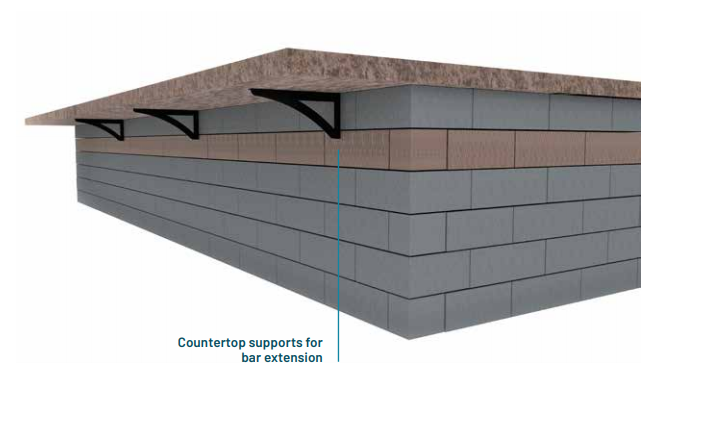
Your countertop manufacturer can advise how many braces are required and the best materials and fasteners to use based on your design. Never use steel as it will rust and negatively impact the appearance of your project over time. However, regardless of the materials used, it is not recommended to extend a counter beyond 12″ from the face of the island.
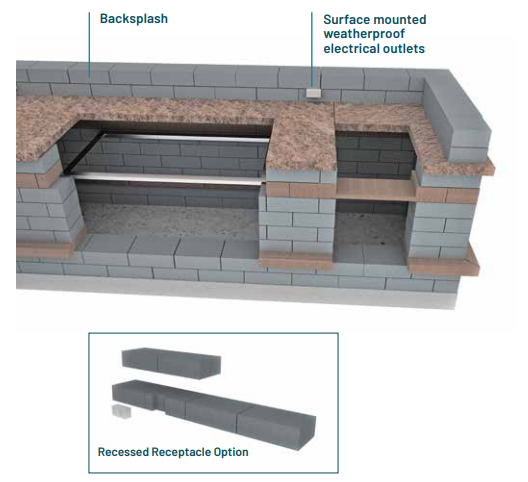
- Step 1: Minimal glue is required to adhere row 1 of the backsplash to the countertop. The maximum height of a backsplash is 10-12″ and it is often constructed using the same material as the rest of the island.
- Step 2: Several blocks may be notched to accommodate a recessed receptacle and provision for electrical can be made by drilling through the counter. However, surface mounting receptacles is often an easier option.
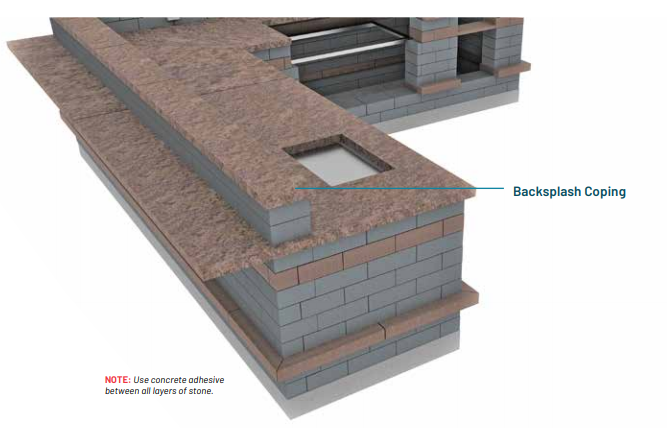
- Step 1: Using the same material as the countertop looks the best.
- Step 2: Adhere using concrete adhesive.
- Step 3: Add under countertop and backsplash coping lighting if desired. Drill holes through the countertop and blocks to run low voltage wiring and adhere LED lights.
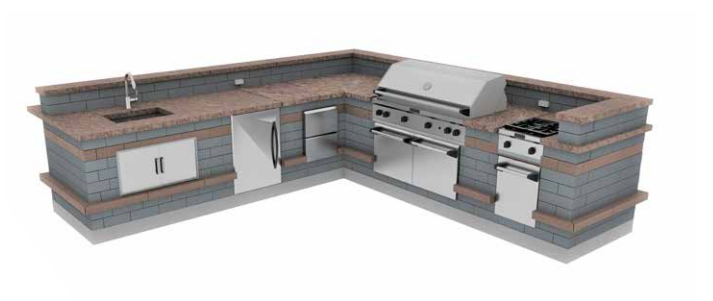
- Step 1: Install all appliances in accordance to manufacturer’s requirements. Always observe local building codes.
- Step 2: Access doors and drawers may require drilling for screws into the concrete to secure the unit.
- Step 3: Install the bar fridge last, as this is typically the easiest item to install and can provide you access to other hookups.
For more help designing and building outdoor kitchens, contact your local Unilock Territory Manager (1-800-UNILOCK) to arrange a phone consultation or site visit.
Support
When designing an outdoor kitchen layout, focus on how the homeowner will move between key zones—cooking, preparation, serving, and cleaning. Ensure adequate counter space, proper ventilation, and easy access to utilities like water, gas, and electricity.
Choosing the right Unilock products depends on your client’s design vision. Recommend products based on aesthetic appeal, durability, and functionality. For outdoor kitchens, opt for durable wall products like U-Cara® or Lineo™ Dimensional Stone, which can withstand exposure to the elements.
Yes, Unilock products are versatile enough to build custom features such as pizza ovens, grill islands, and even bar islands. For example, U-Cara® Modular cabinets allow you to customize your outdoor grill station to incorporate several different appliances and features and are easy to install and move around on the job site. At the start of the planning stages, determine what features your client would like integrated into the outdoor kitchen.
Contact CustomerService@unilock.com or please fill out the form below with details about the issue.
Veuillez appeler le 1-800-Unilock ou contacter l'un de nos responsables de territoire.
- Asus Zenfone 10
- Google Pixel 8
- Google Pixel 8 Pro
- Google Pixel 7
- Google Pixel 7 Pro
- Google Pixel 7a
- Google Pixel Fold
- OnePlus 11 5G
- OnePlus 11R 5G
- OnePlus 12
- OnePlus Open
- Motorola Edge (2023)
- Moto G Power 5G
- Moto G Stylus 5G (2023)
- Motorola ThinkPhone
- Samsung Galaxy S23
- Samsung Galaxy S23+
- Samsung Galaxy S23 Ultra
- Samsung Galaxy Z Flip 5
- Samsung Galaxy Z Fold 5
- iPhone 12 Pro
- iPhone 12 Pro Max
- iPhone 13 Pro
- iPhone 13 Pro Max
- iPhone 14 Pro
- iPhone 14 Pro Max
- iPad Pro 12.9‑inch (4th generation and later)
- iPad Pro 11‑inch (2nd generation and later)


our website to serve you better
